Recently, increasing number of people would like to repair broken vessels with food-safe kintsugi using urushi lacquer.
However, have you ever repaired a vessel with instant glue before learning about kintsugi?
We receive many requests from both Japan and other countries to remove the synthetic glue that has already been bonded badly and to repair it again using a food-safe kintsugi.

However, the synthetic adhesive is too strong so that we cannot easily remove it using solvents such as acetone or ethanol.
This article will answer the question of whether it is possible to remove already glued synthetic adhesives, and if so, how to do so and what to look out for.
Table of Contents
- Can I use the kintusgi kit on a ceramic plate that has been glued together already?
- Can I Redo Misaligned Repairs with Mugi-urushi?
Can I use the kintusgi kit on a ceramic plate that has been glued together already?
Answer: Yes, you can do kintsugi!
Here is the process.
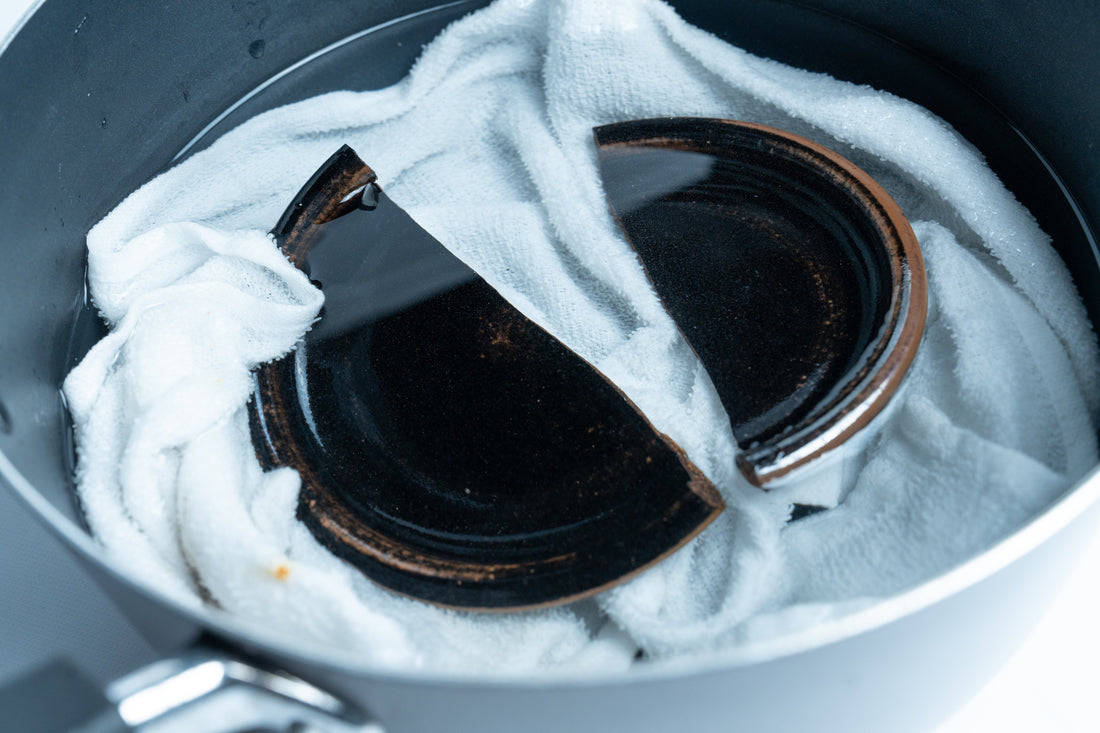
First, put your vessel and towel in a hot water and boil for around 30 mins to let them separate.
The towel prevents the vessel from hitting the pot directly. Hitting to the surface of the pot may cause further damage to your vessel.

Note: Be careful for the vessel with an easily peelable gold leaf on the surface. Boiling the vessel may cause the gold leaf to peel off.
After we could remove the superglue?
Use an utility knife to scrape off any synthetic adhesive remaining on the cracked or chipped cross section.
If even a small amount of synthetic adhesive remains on the cross section of the crack, it causes a gap when you re-glued with mugi-urushi, due to excess material being stuck in the crack.
Remove as much of the synthetic adhesive as possible.
Then, please proceed to the regular step of kintsugi!
If the boiling could not remove the superglue?
Often, we cannot remove the glue because it is very strong. Then, we won’t try to remove it further.
Instead, use an electric carving pen to grind off the synthetic glue on the surface of your vessel to a depth where your fingers can hang the surface (enough depth to allow sabi-urushi to be applied inside).

Then, please proceed to the step 3 (Filling with sabi urushi).
Once the kintsugi is completed, you will not know if there is any synthetic glue left inside.
Electric Carving Pen: https://tsugu-tsugu.shop-kintsugi.com/products/electric-carving-pen-for-kintsugi

Can I Redo Misaligned Repairs with Mugi-urushi?
In traditional kintsugi—using urushi lacquer rather than synthetic adhesives—it’s also not uncommon to hear that the pieces sometimes shift out of alignment and need to be redone. Below, we’ll show you how to remove the mugi-urushi bond and re-start the repair.
How to separate pieces that were bonded with mugi-urushi:
- Fill a large pot with water and place a towel inside to prevent the pieces from moving and getting scratched.
- Place the piece in the water and bring it to a boil. Once boiling, let it simmer for 30 minutes.
- Turn off the heat and leave it in the pot until the water cools.
(Once the water is cool enough to touch, you can start scraping off the excess mugi-urushi with a cutter or similar tool while it's still submerged.) - Try separating the bonded pieces while they are still in the warm water.

If there are some mugi-urushi residue on the broken edges, carefully scrape it off using an utility knife or similar tool to clean the surface.
If mugi-urushi from a previous repair remains on the broken edges, it can get in the way during the next bonding and cause the pieces to shift out of alignment.
Then, prepare fresh mugi-urushi and reattach the pieces, making sure they are properly aligned.
We hope your successful kintsugi experience!